Invite and Manage Your Team
For whoever administers who can see and do what. Cat Factory has real user identities, more than one way to sign in, and email invitations for bringing teammates into a shared organization. This page covers how people get in, the roles they hold, and how to invite them.
Signing in
A deployment can offer any combination of three sign-in providers, each enabled by its operator:
- GitHub OAuth. Also the source of repository access: the per-tenant Register the GitHub App installation mints the tokens agents use, so repo access never depends on a personal GitHub token.
- Google OAuth.
- Email + password (hashed with PBKDF2).
You can also sign in with your own GitHub or GitLab personal access token: paste the token and the server resolves it to your account, subject to the deployment's allowlists. A hosted deployment always requires one of these; it has no anonymous access.
A person does not need a GitHub account to use Cat Factory. Because repository access comes from the GitHub App rather than a user's own token, a Google- or password-only user works fully.
One person is one user. Signing in through different providers that share the same verified email resolves to the same identity rather than creating duplicates.
Who can sign up
Creating a new user is invite-only by default. A new person gets in one of two ways:
- They redeem an email invitation.
- Their email domain is on the self-signup allowlist (
AUTH_ALLOWED_EMAIL_DOMAINS).
This is fail-closed: with no matching invitation and no allowlisted domain, signup is refused. Existing users just sign in.
Accounts and roles
An account is the top-level owner you work under:
- A personal account, one per user, owned by that user.
- An organization account, shared by several members.
Each member of an account holds a combinable set of roles (at least one). A member can hold any combination, for example an admin who is also a product owner:
| Role | Grants |
|---|---|
| Admin | Modify everything about the org account: its settings, members and their roles, invitations, the account's email sender, and account-scoped provider API keys. |
| Developer | The default role. Membership itself (see and act on the account's boards) with no special account-management powers. |
| Product | Can be set as a task's responsible product person and is notified when a requirement (or bug-clarity) review raises findings on that task. Pair it with developer or admin for build access. |
Whoever creates an organization account becomes its first admin (and cannot drop their own admin role while they are the one editing). An admin assigns roles per member from the team settings. Finer access within a board is still governed by per-workspace membership controls.
Opening account settings
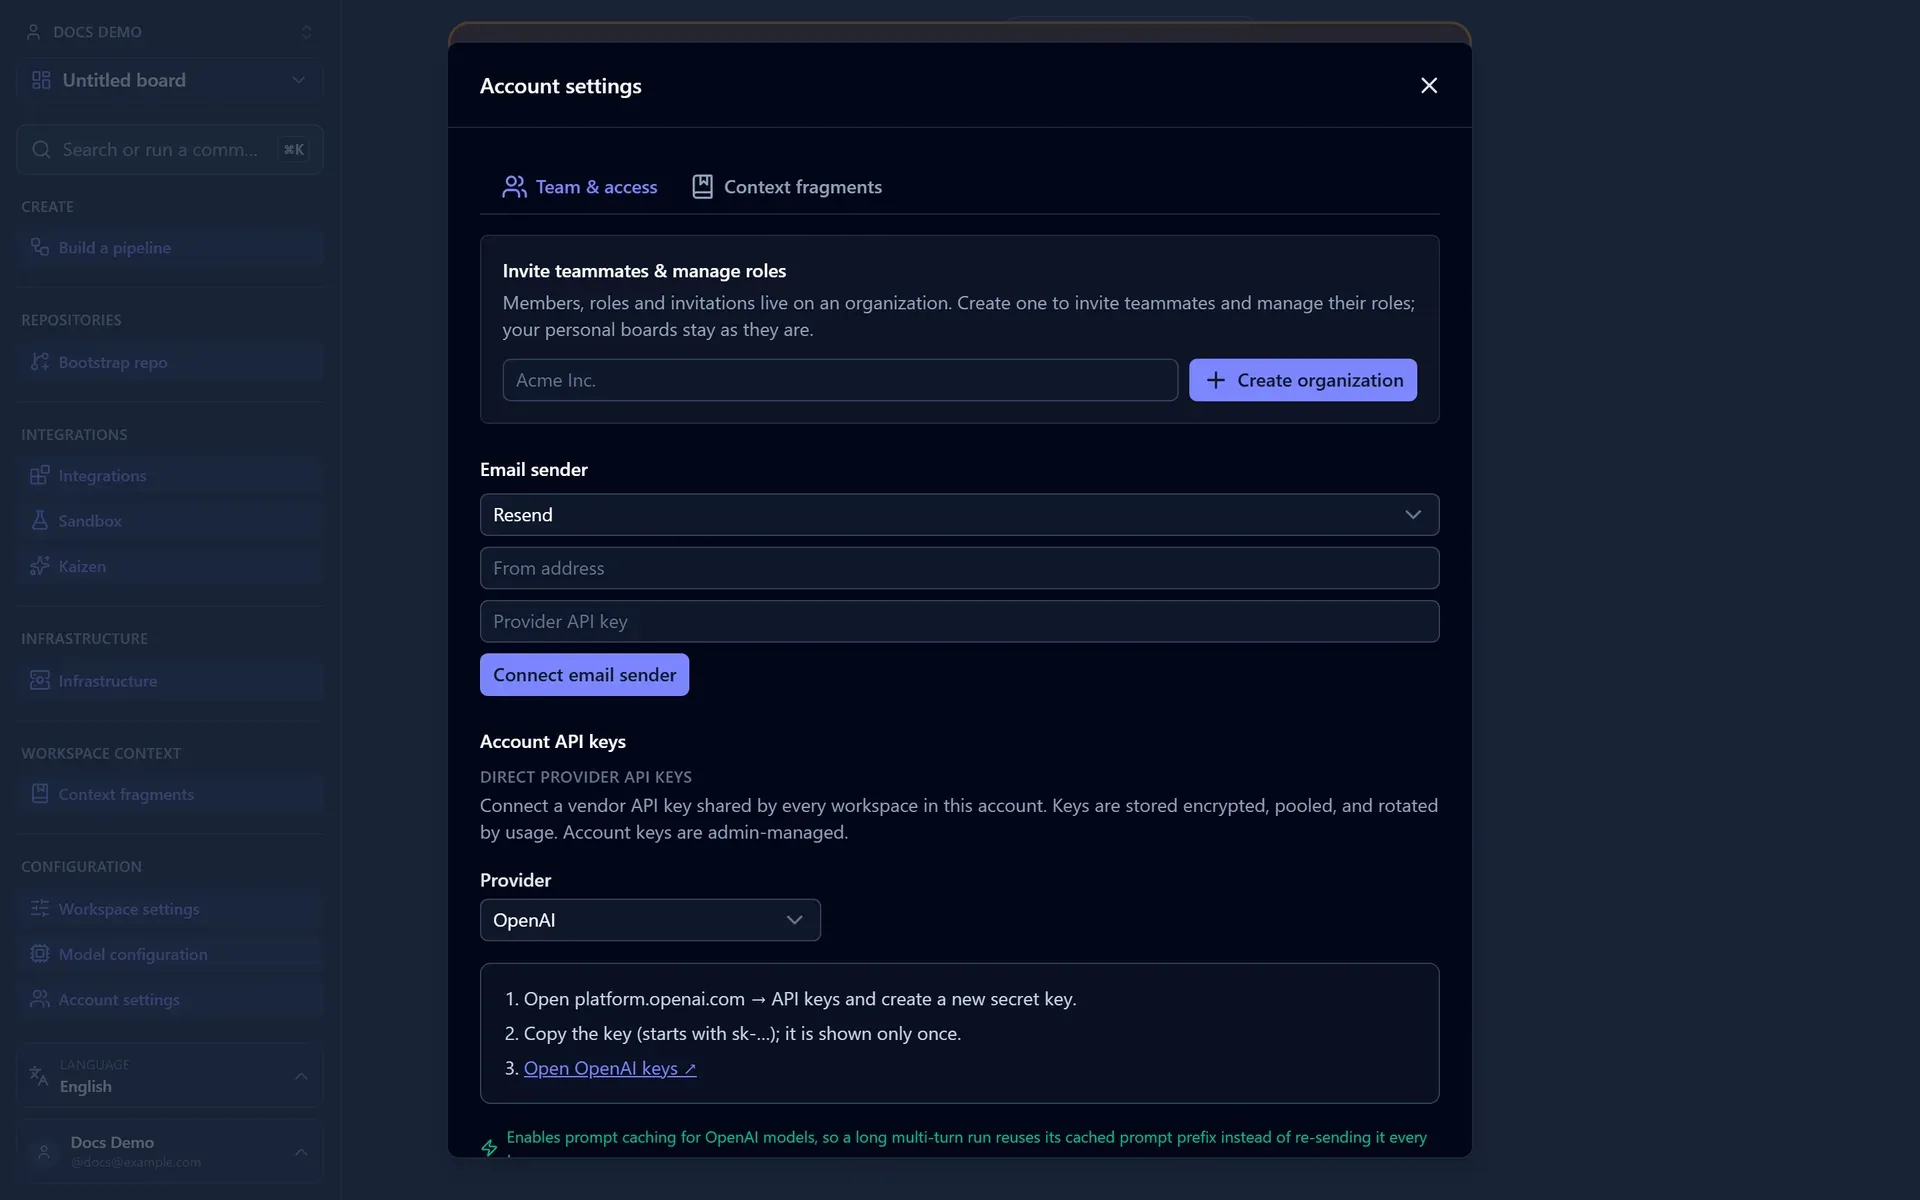
Open Account settings from the sidebar's Configuration group (or the account switcher). It hosts the account's members and roles, invitations, the email sender, account-scoped provider keys, and the account-tier prompt fragments. The panel follows the active account: switch accounts while it is open and it reloads for the one you switched to. On a personal account the membership controls prompt you to create an organization first (members, roles, and invitations are org-scoped); the email sender is available on a personal account too.
What roles control
Roles describe what someone may do in the account. A product owner who never writes code still needs no key of their own; repo and model access come from the account/workspace pools. Conversely, granting admin is the only way to let someone manage the org's keys, email sender, and members.
Board access and workspace roles
Account roles govern the whole tenant. Below them, each board carries its own workspace roles that scope what a person can do inside that one board. The two layers stack: account membership is the prerequisite, and the workspace role decides the rest.
Three workspace roles form a strict ladder:
| Role | Can |
|---|---|
| Viewer | Read-only. See the board, runs, spend, and metrics, but change nothing. |
| Member | The working role. Everything a viewer can do, plus edit the board (blocks, dependencies, pipelines) and start and control agent runs. |
| Admin | Everything, plus board settings, integrations, secrets and keys, and managing the board's own member list. |
Every board has an access mode:
- Open to the account (the default): every account member can see the board and acts as at least a Member. Existing boards behave exactly as before, with no migration.
- Restricted: only the people on the board's explicit member list can see it, each at their assigned workspace role.
An account admin is always a board admin, so a board can never lock everyone out. Leaving a board or demoting yourself is allowed.
Managing a board's members
Open Workspace settings → Members (the tab shows only to a board admin). There you can:
- Toggle Restrict to members to switch the board between open and restricted access.
- Add a member from the owning account's existing people and pick their role (defaults to Member). You add people the account already has: to bring in someone new, send an email invitation at the account level first, then scope them to boards.
- Change a member's role inline, or remove them.
The board's creator is enrolled as an admin automatically.
A Viewer sees the board as read-only: editing gestures (drag, resize, delete) are disabled with a "Read-only access" note, run and review-window actions are disabled while the windows stay readable, and the board switcher badges such a board Viewer (a restricted board also shows a lock icon).
The responsible product person
A task can name a responsible product person: any account member who holds the product role. Set it from the task's run settings in the inspector ("Responsible product"). When that task's requirements review (or the bug-fix pipeline's clarity review) raises findings, the responsible person's inbox highlights the notification as theirs, so the right product owner is pulled in to answer the open questions. The notification stays visible to the whole workspace; the responsible person just gets it flagged directly. Leave it unassigned and the findings notify the task's creator instead.
Inviting teammates
From the account's team settings, an admin invites a teammate by email and picks the role set to grant (defaults to developer). Cat Factory mints a single-use, tokened accept link and:
- emails it through the account's connected email sender when one is configured, or
- returns the link for you to share by hand when no sender is connected.
Invitations are deliberately narrow:
- They expire after 7 days.
- They are bound to the invited address: the accepting user's verified email must match the address the invite was sent to, so a leaked link is useless to anyone else.
- Re-inviting the same address supersedes any still-pending invite, so only the most recent link stays redeemable.
- An admin can revoke a pending invitation at any time.
The invitee opens the link, signs in or signs up (the invitation satisfies the invite-only gate), and joins the organization with the role they were given.
Sending invitation emails
Email delivery is connected per account in the UI. Like the Slack bot token, an admin onboards it in settings and the credential is stored sealed in the database under ENCRYPTION_KEY:
- Pick a provider, SendGrid or Resend.
- Paste its API key and set the From address.
- Send a test email to confirm it works.
Email needs no deployment enable flag: it is available whenever an ENCRYPTION_KEY is set (that key seals the per-account API key). Set APP_BASE_URL to the origin that accept links point at. See Configuration → Email. Without a connected sender, invitations still work; the accept link is returned for you to share manually.
Interface language
The app ships in English plus additional, still-experimental locales: Spanish, French, Hebrew, Japanese, Polish, Turkish, and Ukrainian. Switch language from the picker next to the user menu; your choice is remembered per user in the browser. Hebrew renders right-to-left. On any non-English language a banner flags the translation as unofficial and possibly inaccurate, with a link to report a mistake or open a fix; dismiss it per language. There is no operator setting for a default language: the app starts in English and each user picks their own.
Named boards
Boards carry a name and description, set when you create one and editable afterwards. Members of an organization see and open its existing boards from the switcher instead of being pushed to create a new one.
Next: set the providers and keys this relies on in Configuration.