Cookbook
For someone who already runs Cat Factory and has one concrete change to make. Task-indexed recipes for changing a flow you already have. The rest of the guide is organized by subject, which is right when you want to understand a mechanism and wrong when you have a concrete edit to make and half an afternoon to make it. Each recipe here is the short path: what to click, what it changes, and the one page to read if you need the full model.
Almost every recipe happens in the pipeline builder, so start with the loop it all hangs on.
The loop every recipe fits into
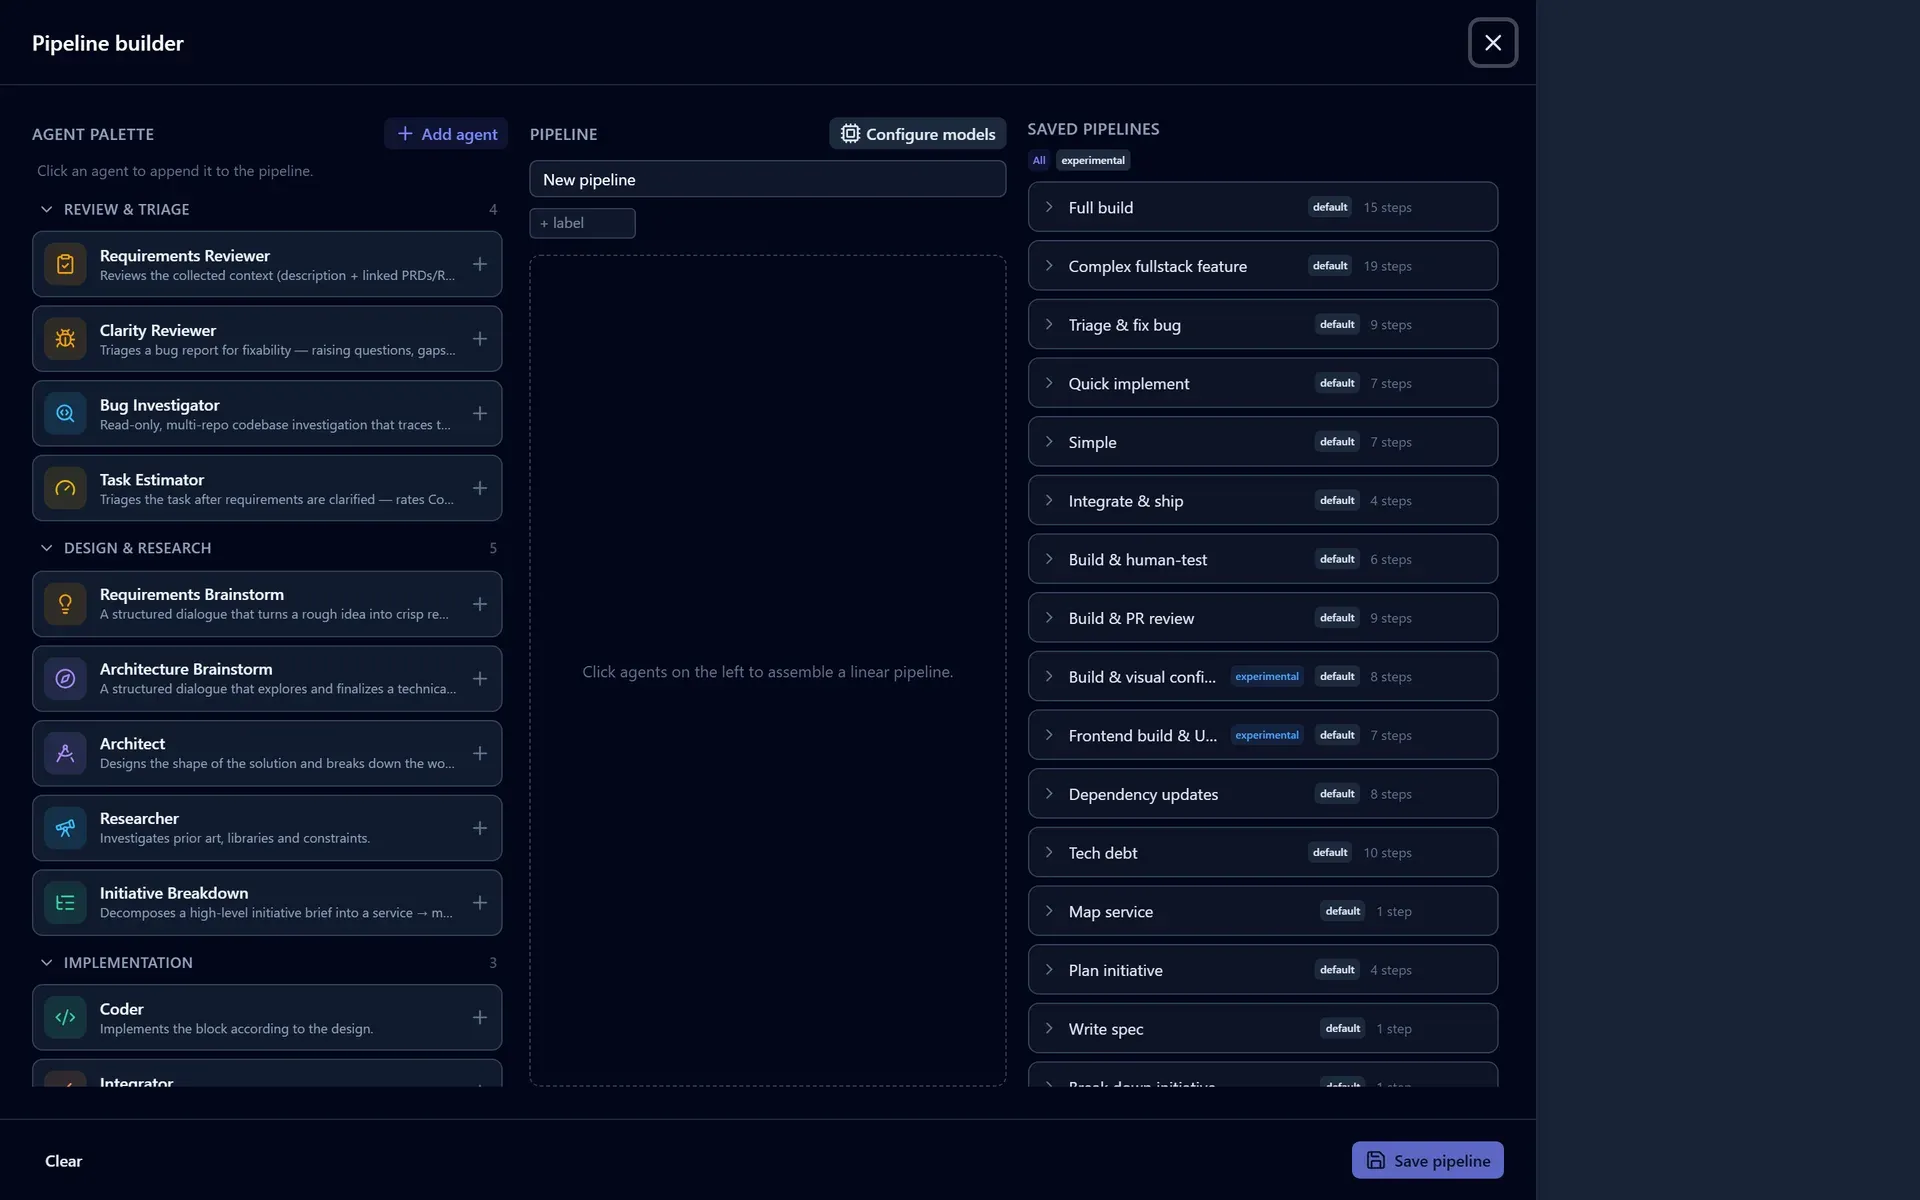
- Open the builder. Press
⌘K/Ctrl-Kand pick Build a pipeline, or use the navbar's Create group. - Clone the pipeline you actually run. Built-ins are read-only templates and carry a default badge, so they offer Clone instead of Edit. The clone opens for editing immediately.
- Make one change from a recipe below.
- Save with Save pipeline (or Update pipeline on an existing custom one). Give the clone a name and a description; the description is what you see when picking the pipeline later.
- Point a task at it: the task inspector's Run settings → Pipeline, or the pipeline field in the add-task form. A run resolves its pipeline when it starts, so your edit applies to the next run, not to one already in flight.
Clone, do not rebuild
Build the change on top of a clone rather than assembling a pipeline from an empty draft. The merge tail (Conflicts Gate, CI Gate, Merger) is seeded into the built-in build pipelines and is not offered in the agent palette, so a from-scratch pipeline cannot gate on real CI or merge for real. Clone Standard build or Simple build and edit from there.
If a kind you expect is missing from the palette, widen the tier selector above it: the palette opens on basic and widens one cumulative level at a time (basic, intermediate, advanced). The hint beside it counts what the current tier is hiding.
Recipes
| I want to | Recipe |
|---|---|
| Have an agent review another agent's work | Add a review step |
| Stop the run and make a person sign off | Add a human approval gate |
| Block the merge on an automatic check | Add a gate |
| Tell one agent to work differently | Change a step's prompt |
| Run a repo-authored playbook as a step | Attach a skill |
| Make every coding agent follow our standards | Apply team standards to every coding step |
| Skip an expensive step on small tasks | Run a step only on big tasks |
| Put a stronger model on one step | Change which model a step runs on |
| Let a step write more (or less) | Cap what a step may write |
| Take a step out for now | Turn a step off without deleting it |
| Get several models to agree on a step | Run a step as a multi-model panel |
| Put things back how they were | Undo a change |
Add a review step
Decide first which of the two shapes you want, because they behave differently.
A companion loops its producer back automatically. Hover the producer step in the draft and click Add the <companion>. It is inserted directly after the step it reviews, rates the work, and sends it back for rework without asking anyone whenever the rating is below the quality bar or the review left a Must fix finding open. When it runs out of rework rounds it parks with a Decide prompt (one more round, proceed anyway, or stop and reset). The shipped pairs:
| Producer | Companion |
|---|---|
| Coder | Reviewer |
| Architect | Architect Companion |
| Spec Writer | Spec Reviewer |
| Doc Writer | Doc Reviewer |
Companions are toggles on their producer, not palette blocks, because a companion has no meaning anywhere else in the chain.
A standalone review step reports and moves on. Add PR Reviewer from the palette's Review & triage category for a deep, token-bounded review of the open pull request that returns prioritized findings you triage yourself. It writes no code.
Full model: Choose and Edit a Pipeline → Anatomy of a pipeline and Review and Merge Pull Requests.
Add a human approval gate
Use this when a person must look before the run continues.
- Click the shield control on the step: Require human approval after this step.
- Open the step's gate settings and set who clears it: Who may approve (Admins, Members), optional Named approvers, and Approvals required, each from a different person.
- Save.
The run reaches the step, finishes it, then moves to Needs decision and raises an inbox notification. It waits as long as it needs; nothing times out. The notification turns red and is flagged Overdue past the workspace's escalation threshold, set in Workspace settings.
A step may not carry both a human approval gate and an estimate gate. An estimate may add a checkpoint, never cancel one, so pick one.
Add a gate
A gate runs a cheap deterministic check and only spins an agent up when the check fails.
- Human Review Gate and Post-Release Health are in the palette's Gates & observability category. Post-Release Health appears only once an observability integration is connected.
- Human test and Visual Confirmation are in the Testing category. Human test stands up an ephemeral environment and parks for you to validate against its live URL.
- CI Gate, Conflicts Gate, and Merger are not palette blocks. They arrive with a cloned build pipeline, which is the reason to clone rather than rebuild.
A gate whose provider the deployment has not wired is a pass-through: it records that it was skipped and the run continues, so adding one is safe before the integration exists. When a gate declares its own parameters, they render as Gate settings on the step, straight from the gate's registration.
Gates your deployment writes itself (a license-header check, an internal compliance probe) are code, not a builder operation. See Add a Custom Gate or Judge.
Change a step's prompt
The builder can replace an agent kind's system prompt for the whole workspace.
- Click the pencil on the step. The System prompt: <agent> editor opens.
- Read the shipped text first with Compare with built-in, or pull it into the editor with Load built-in text and edit from there.
- Write what the agent should do and click Save as new version.
What to know before you do it:
- The scope is the agent kind across the workspace, not this one step in this one pipeline. Every pipeline that runs that kind gets the new prompt.
- The platform still appends its own non-editable rules on top. Show what gets appended lists them, so you can see what you cannot edit away.
- Every version is kept. The history lists each revision, Load puts an old one back in the editor, and you save it to make it live. Back to built-in is itself a recorded version, and it resumes tracking the shipped prompt as it improves rather than pinning a stale copy.
- If two people edit at once, the second save is refused rather than silently winning.
If your deployment registers prompt variants for a kind, pick one from the step's Prompt variant selector instead of editing: same job, different instructions, no workspace-wide change.
For guidance that many kinds should follow rather than one kind's whole job, use prompt fragments instead. Full model: Rewriting an agent's prompt.
Attach a skill
A Claude Skill is a procedural playbook your team authors in a repository and runs as a pipeline step.
- Link the source once, at the account tier: Account settings → Skills, then search for the repo (or enter owner, repo, and directory by hand) and click Link & sync. Every skill directory under it joins the catalog every board in the account shares.
- Add a Skill step to your cloned pipeline and choose the skill in the step's picker, one skill per step. The pipeline will not save with a Skill step that has no skill selected.
- Save and run. The step clones the repo, follows the playbook, and commits what it prescribes: it amends the task's pull request when one is open, otherwise it branches off base and opens its own. A purely advisory skill that changes nothing is a clean no-op, not a failure.
The step re-checks the source's head commit before each run and resyncs if it moved, so you rarely resync by hand. Renaming a skill's directory creates a new skill and retires the old one, and the builder flags a step pinned to the old name.
To make an existing kind (the Coder, say) always carry a playbook rather than adding a step, that is assignSkills in the deployment's code: Skills and tool servers.
Apply team standards to every coding step
Prompt fragments are standing guidance folded into agents' prompts, where a skill is an executable step.
- Author the fragment in the board's fragment library (workspace tier) or Account settings (every board in the account).
- Assign it on the service inspector's Service best practices, which applies it to every run on that service. A new task inherits that list and then owns its own copy, so you can pin an extra fragment or drop an inherited one per task.
Fragments reach the code-aware kinds (Coder, CI Fixer, Fixer, Reviewer, Architect) and the document-authoring kinds. Each arrives as its own titled block, so name them the way you want them cited ("No raw SQL in controllers" beats "Rules 3"), and the reviewers score the change against each one in their Best-practice adherence section.
Run a step only on big tasks
An expensive step can be made conditional on the task's own estimate.
- Add a Task Estimator step earlier in the pipeline. It scores complexity, risk, and impact in one cheap call.
- On the expensive step, open Gate on estimate and set at least one threshold under run when (any). The scale is 0 to 1. Leave an axis empty to ignore it.
- Save.
The step runs when any one axis is met or exceeded and is skipped otherwise. Three rules bind it: it needs the estimator earlier in the same pipeline, it must set at least one threshold (with none it would always skip), and it cannot also carry a human approval gate. A skipped producer takes its companion with it, so there is no second threshold to keep in sync.
This is exactly how the Adaptive build preset switches its Architect, Tester, and Human Review on per task. Full model: Estimating and gating expensive steps.
Change which model a step runs on
Models come from presets, not from the pipeline. Open Configuration → Model Configuration, or click Configure models in the builder.
- Clone or open a preset. It sets one base model for every agent kind.
- Add a per-kind override for the step you care about, for example a stronger model on the Architect.
- Select the preset on the task (add-task form or the inspector). Changing it affects only steps that have not started yet.
The picker shows each model's list price, provider, and context window as you assign, so keep stronger models for architecturally significant kinds. See Connect a Model Provider → Model presets and Control Spend with Budgets.
Cap what a step may write
A step's Output budget in the builder is the narrowest of three tiers, and the narrowest wins: the step's own value, then the workspace's per-kind setting, then the model route's default. Leaving it empty inherits from the next tier down rather than lifting the limit.
For a kind whose whole deliverable is one reply (a document author, a spec writer) this bounds the artifact, so size it to the work rather than to a runaway guard.
Turn a step off without deleting it
Click the step's disable control: Disable this step (kept in the pipeline but skipped at run). It stays in the saved pipeline and is skipped at run start, which is how you drop one step for a while without rebuilding the chain. At least one step must stay enabled.
For a whole pipeline you no longer run, Archive hides it from the default view without deleting it, and labels keep a long library navigable.
Run a step as a multi-model panel
On deployments where consensus is enabled, eligible steps (Architect, the research and analysis kinds, Reviewer, Task Estimator, PR Reviewer, and the document, design, and spec companions) can run as several models instead of one.
Enable consensus on the step, then either pick reusable consensus groups the step may escalate to, or configure participants inline. Each group carries its own estimate bar, and the engine convenes the most demanding one the task clears, falling back to a single agent when it clears none. Strategies are specialist panel, debate (1 to 5 rounds), and ranked voting. Details: Multi-model consensus.
Undo a change
| What you changed | How to put it back |
|---|---|
| An agent's prompt | Back to built-in in the prompt editor. It is recorded as a version, and the kind resumes tracking the shipped prompt. |
| A cloned pipeline | Delete it (or archive it) and clone the built-in again. The built-in was never modified. |
| A task's pipeline | Repoint it in the inspector's Run settings → Pipeline. |
| A built-in that drifted from the catalog | The startup pipeline-health check offers Reseed, which restores the canonical definition and keeps your labels and archive state. |
When the builder refuses to save
| What it says | What to do |
|---|---|
| A gated step needs an estimate before it | Add a Task Estimator earlier (or a Task Reassessor, if the step you are gating runs after the change lands), or clear the step's estimate thresholds. |
| A Skill step needs a skill selected before you can save | Pick a skill on the step, or remove the step. |
| This skill is no longer in the catalog; pick another | The skill's directory was renamed or unlinked. Pick the current one. |
| This purpose writes no code and runs no tests, but the pipeline still has implementation or testing steps | Remove those steps, or set Purpose back to Build. |
| A step that generates binary outputs has no storage service selected | Pick a storage service on the step. See Binary-output steps. |
When a run is refused at start
| What it says | What to do |
|---|---|
| This service needs an environment provisioned before a Tester, human-test, or Playwright step can run | Add a Deployer step before it. |
| This pipeline has visual test steps, but the target has no user interface to exercise | Run it on a frontend frame, or one that binds to a frontend. See Preview and Test a Frontend. |
| Model preset can't run this pipeline | An inline step (the requirements reviewer, for example) is pinned to a subscription-only model, which runs only in container agents. Point the inline steps at a provider-backed model: a direct API key, an aggregator, or Cloudflare AI. |
| No storage for this pipeline | The pipeline includes an agent that needs binary storage. Configure content storage for the account. |
Where a recipe stops and code starts
Everything above is a UI operation on a workspace. Three things are not, and each needs a change in your deployment repository:
- A new agent kind, gate, or judge of your own, including a gate's helper agent and a kind's bundled skills or MCP tool servers: Add a Custom Agent Kind. Registered kinds arrive in the palette with no frontend rebuild.
- A new task type and other frontend contributions: Extend the App with Frontend Modules.
- New infrastructure providers (environments, runner pools): Add a Custom Provider and Integration Manifests.
Next: the full pipeline model behind these recipes, in Choose and Edit a Pipeline and Run a Pipeline.